ORC Week 7: Outdoor Kitchen DIY, Part 2 (The Countertops)
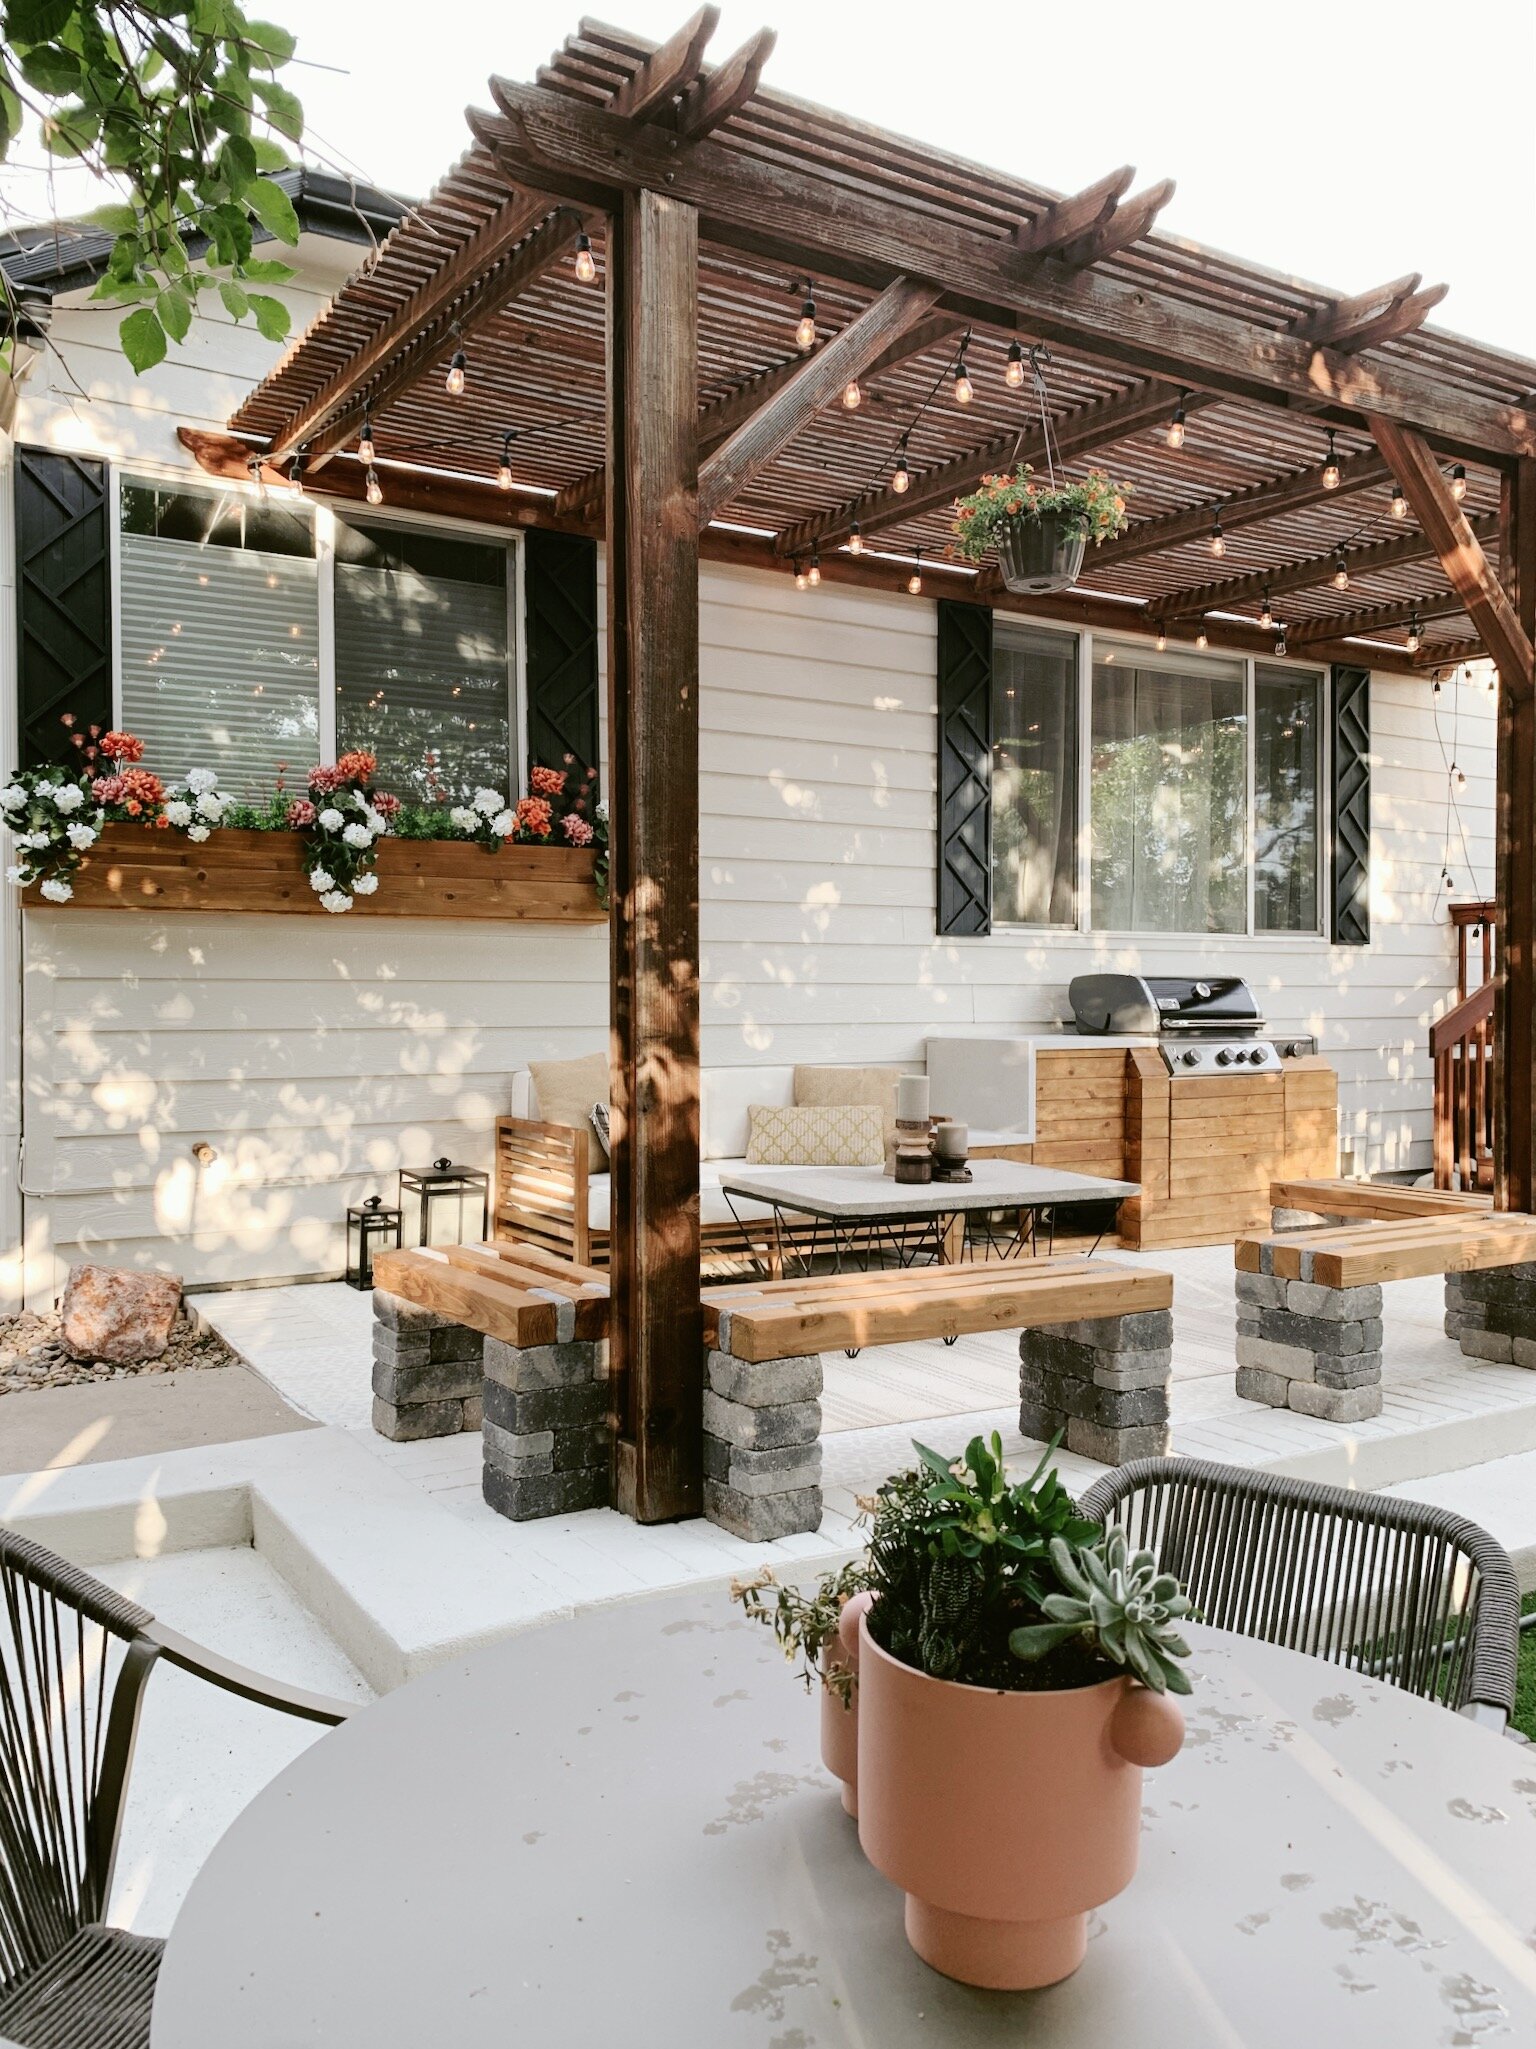
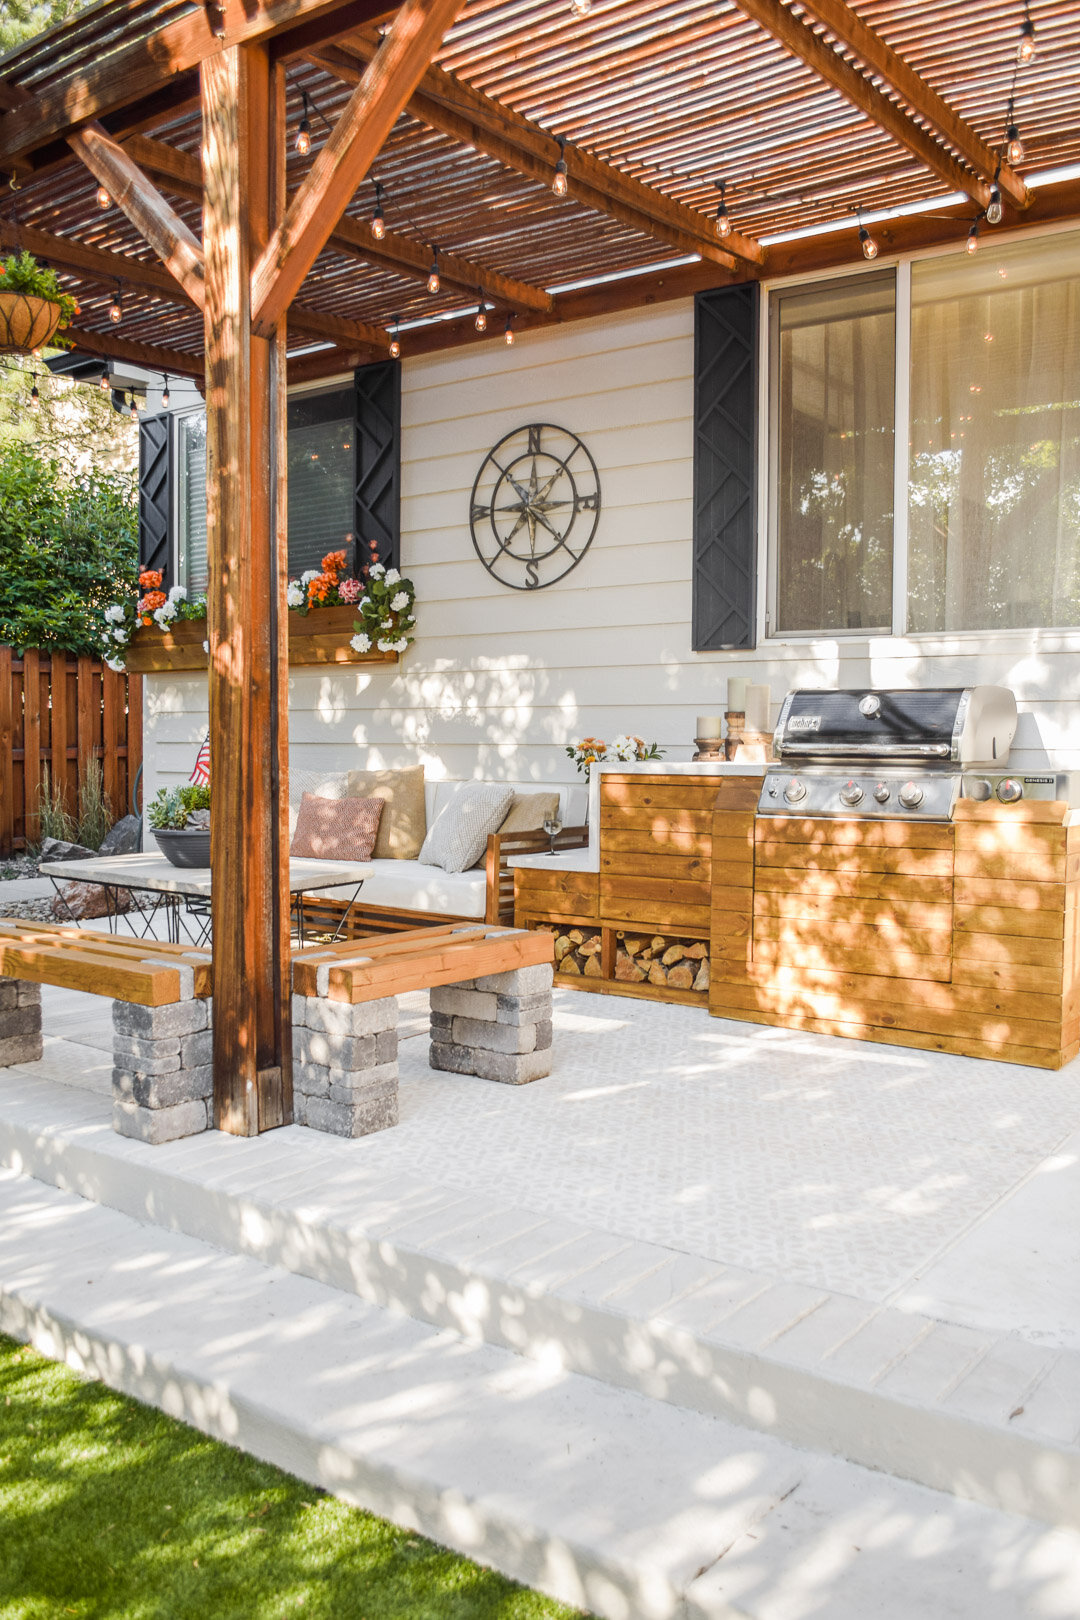
We are in love with our new outdoor kitchen!
…and the countertops were SO easy!
First things first: We owe such a huge thank-you to our local Ace Hardware (Westwoods Ace) for sponsoring the wood and paint for our entire patio makeover. Truly, “Ace is the place with the helpful hardware folk,” and they had the materials we needed to complete this easy DIY.
Without further ado, here’s the awesome, VERY affordable and might I say pretty darn good-looking countertop solution that we (who am I kidding… my husband Jason) came up with:
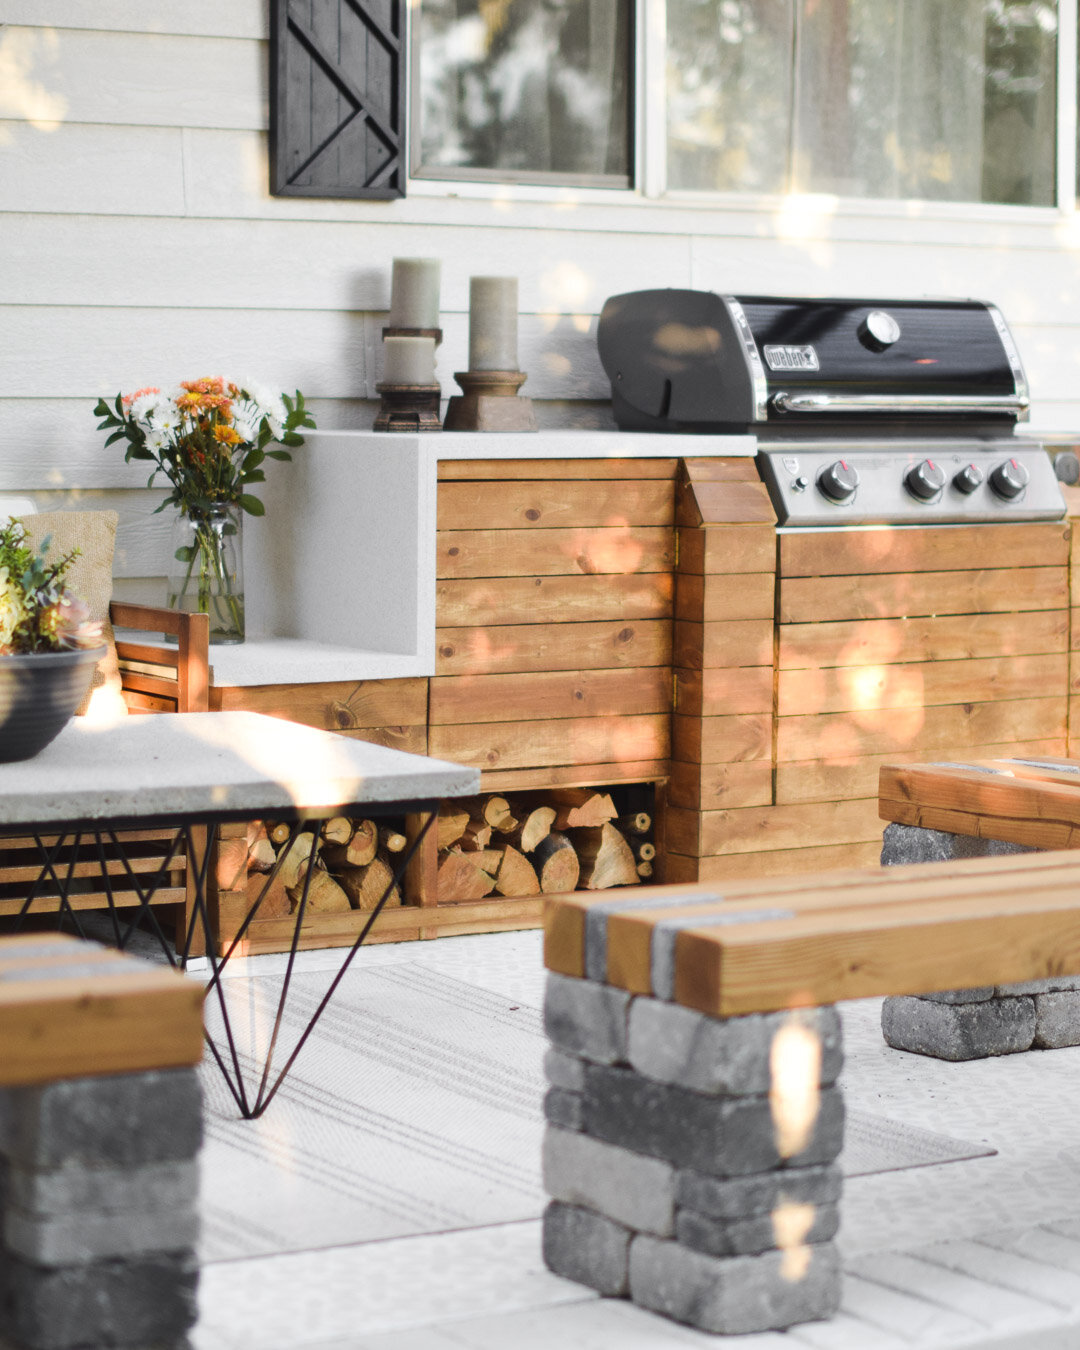
DIY Concrete-Look Waterfall Countertop
Can I quickly say before getting into this that if you missed Part One: DIY Outdoor Kitchen, here it is!
Materials:
Metrie Spruce Project Panels, natural surface, lightly sanded (these are only offered in-store, but they are the most true slabs of finish wood you can find) – 2′ x 6′
Two (2) 1″ x 4″ x 8′ boards (common wood works, but make sure they’re straight!)
Exterior Paint— We used the same exterior paint as what’s on our house (Clark and Kensington Exterior Satin color-matched to Benjamin Moore Edgecomb Gray) to protect the wood and provide background for the concrete-finish spray
120 grit sand paper (orbital sander preferred)
Table saw (or circular saw)
Tape measure
Right angle
Finish nails (finish nail gun preferred)
Wood putty (to fill nail holes)
Finish caulk
Painters plastic and painters tape
Steps:
First and foremost, you have to always sketch and measure your dimensions for the countertop from both plan view (birds eye, or above) and from an elevation view (side-view). This helps you visualize the shape and overall intent of your project.

Once you have your measurements, you will use your 1″ x 4″ board to frame and support the wood top. This not only allows you to more easily frame out the overall look of your countertop, but it also provides an extra 3/4″ of thickness on your faux counter
Cut your 1″ x 4″ boards to the horizontal lengths on each elevation (surface) of your countertop and screw them to the framing below. Make sure you are fastening them at right angles and at the same location that you will want the edge of your countertop to sit. We typically leave 3/4″ to 1″ of overhang for a countertop.
Once your countertop is framed out by your 1″x4″ boards, you will remeasure the dimensions of your countertop so you have accurate dimensions to cut the upper top, side panel (waterfall), and the lower top. Use your angle, tape, and circular or table saw to cut a very straight line across these boards.
Now work from the lower top moving up and fasten the tops to the 1″x4″ framing with finish nails. Make sure you line up the front edge of the top board with the edge of the 1×4’s.
Once your tops are installed, sand the edges to your liking. There will inevitably be some areas where sanding will help make the edges flush on connected wood. If you still have gaps or bigger indents, use your finish caulk to fill or smooth out those areas.
Fill nail holes with wood filler and sand after for a smooth finish.

Congrats, you’ve built a beautiful wood countertop! Now, on to the finishing:
To avoid messes and overspray, always tape and cover with plastic the surfaces around the material you’re painting. A wise old superintendent once told Jason, “The more time you take to prepare your work area, the less time you’ll spend cleaning at the end!”
You will now paint your wood a color that matches the speckling in the concrete finish spray. This will be the base color on the countertop, so make sure it is one you like!
Once the paint dries, you are ready to spray the concrete finish! This is truly the most rewarding last step of any project we’ve done. Spray evenly and to your liking. We used 1.5 cans to get the consistency and finish we wanted. Cover it with the shellac clear sealer first, and then with the UV-resistant Krylon sealer spray to protect the coloring of your beautiful work.

Voila! You now have a brand new concrete, I mean, faux concrete countertop!
We are beyond thrilled with how this turned out! So far, it’s survived two big storms and doesn’t show any signs of damage or wear. We’ll keep you posted on how well it does through its first year of life. Feel free to ask us anything in the comments, too!