

ORC Week 6: Outdoor Kitchen DIY, Part 1
I can’t believe we’re so close to the end of the 2020 Spring/Summer One Room Challenge already!
While we’ve made incredible progress on our patio these past seven weeks, we still have a handful of to-dos, which always seem to take until the last week. Where are my fellow 80-percenters?!
Remaining ORC To-Dos for the final week:
Touch-up paint and stencil around the perimeter.
We decided to paint part of the lower steps, too, so now I need to go buy more paint so I can finish those areas.

3. Install a paver stone border around the perimeter of the artificial grass area.

4. Build a window box and fill it with artificial plants sponsored by Afloral.
5. Hang live plants from the pergola.
6. Finish the stain/paint (still TBD how we want to finish it) on the wood for the outdoor kitchen (and bring out the mini-fridge—woo hoo!).
7. Build the mold for the concrete countertop, fill it with concrete mix, allow to dry, wet sand, and place it on the outdoor kitchen (we sure hope this turns out how we’ve planned!).
8. Pray for our new hydrangeas to bloom in time for me to snap my reveal photos!
Before we get to the grill…
Mega Thank-You to #MyLocalAce
Just when I thought they couldn’t be any better of neighbors, our guys at the Westwoods Ace Hardware right around the corner from us came in CLUTCH when I needed them the most! Jason (my husband) was at a job site for work and our baby Joe was taking a nap when I learned via Marcus (stage right in this pic) that our new Weber grill had arrived, along with the 80 lb. bag of concrete mix and allllllll that wood for the framing of (and modern shiplap finish on) the outdoor kitchen!

Note: This photo received a lot of criticism when I first shared it. To be fair, this was taken in May 2020, before masks were mandatory for all. I worked from home and didn’t leave the house much, if at all, during this time because information kept changing, so I didn’t own any masks yet at this point. I’ve since worn a mask everywhere and have been vaccinated.
Since last week was also Jason’s birthday, I wanted to surprise him by having everything here at our house when he got home from a long day of work. Lucky for me, Ace Hardware offers home delivery now! It’s a safety precaution they’ve taken since COVID-19 started spreading here in the U.S. back in the early spring. They’ll actually assemble your new grill for you, too, but I recalled Jason saying something last week about how he couldn’t wait to assemble his grill and get to know its inner workings, so I told our Ace friends they were off the hook for that part of the job Boy was there a lot of wood to bring up, though!


And now, the reason you’ve arrived at this post:
DIY Modern Outdoor Kitchen, Part 1
Materials:
(x4) 8ft 2×4 boards
(x4) 8ft 2×3 boards
(x14) 8ft 1×4 boards
(2) boxes of 2-1/2” construction screws
Finish nails
Stain and sealer OR paint
Tools:
Level
Tape Measure
Right Angle
Nail Gun (Optional)
Hammer (if you optioned out of nail gun)
Orbital Sander
Step-by-Step
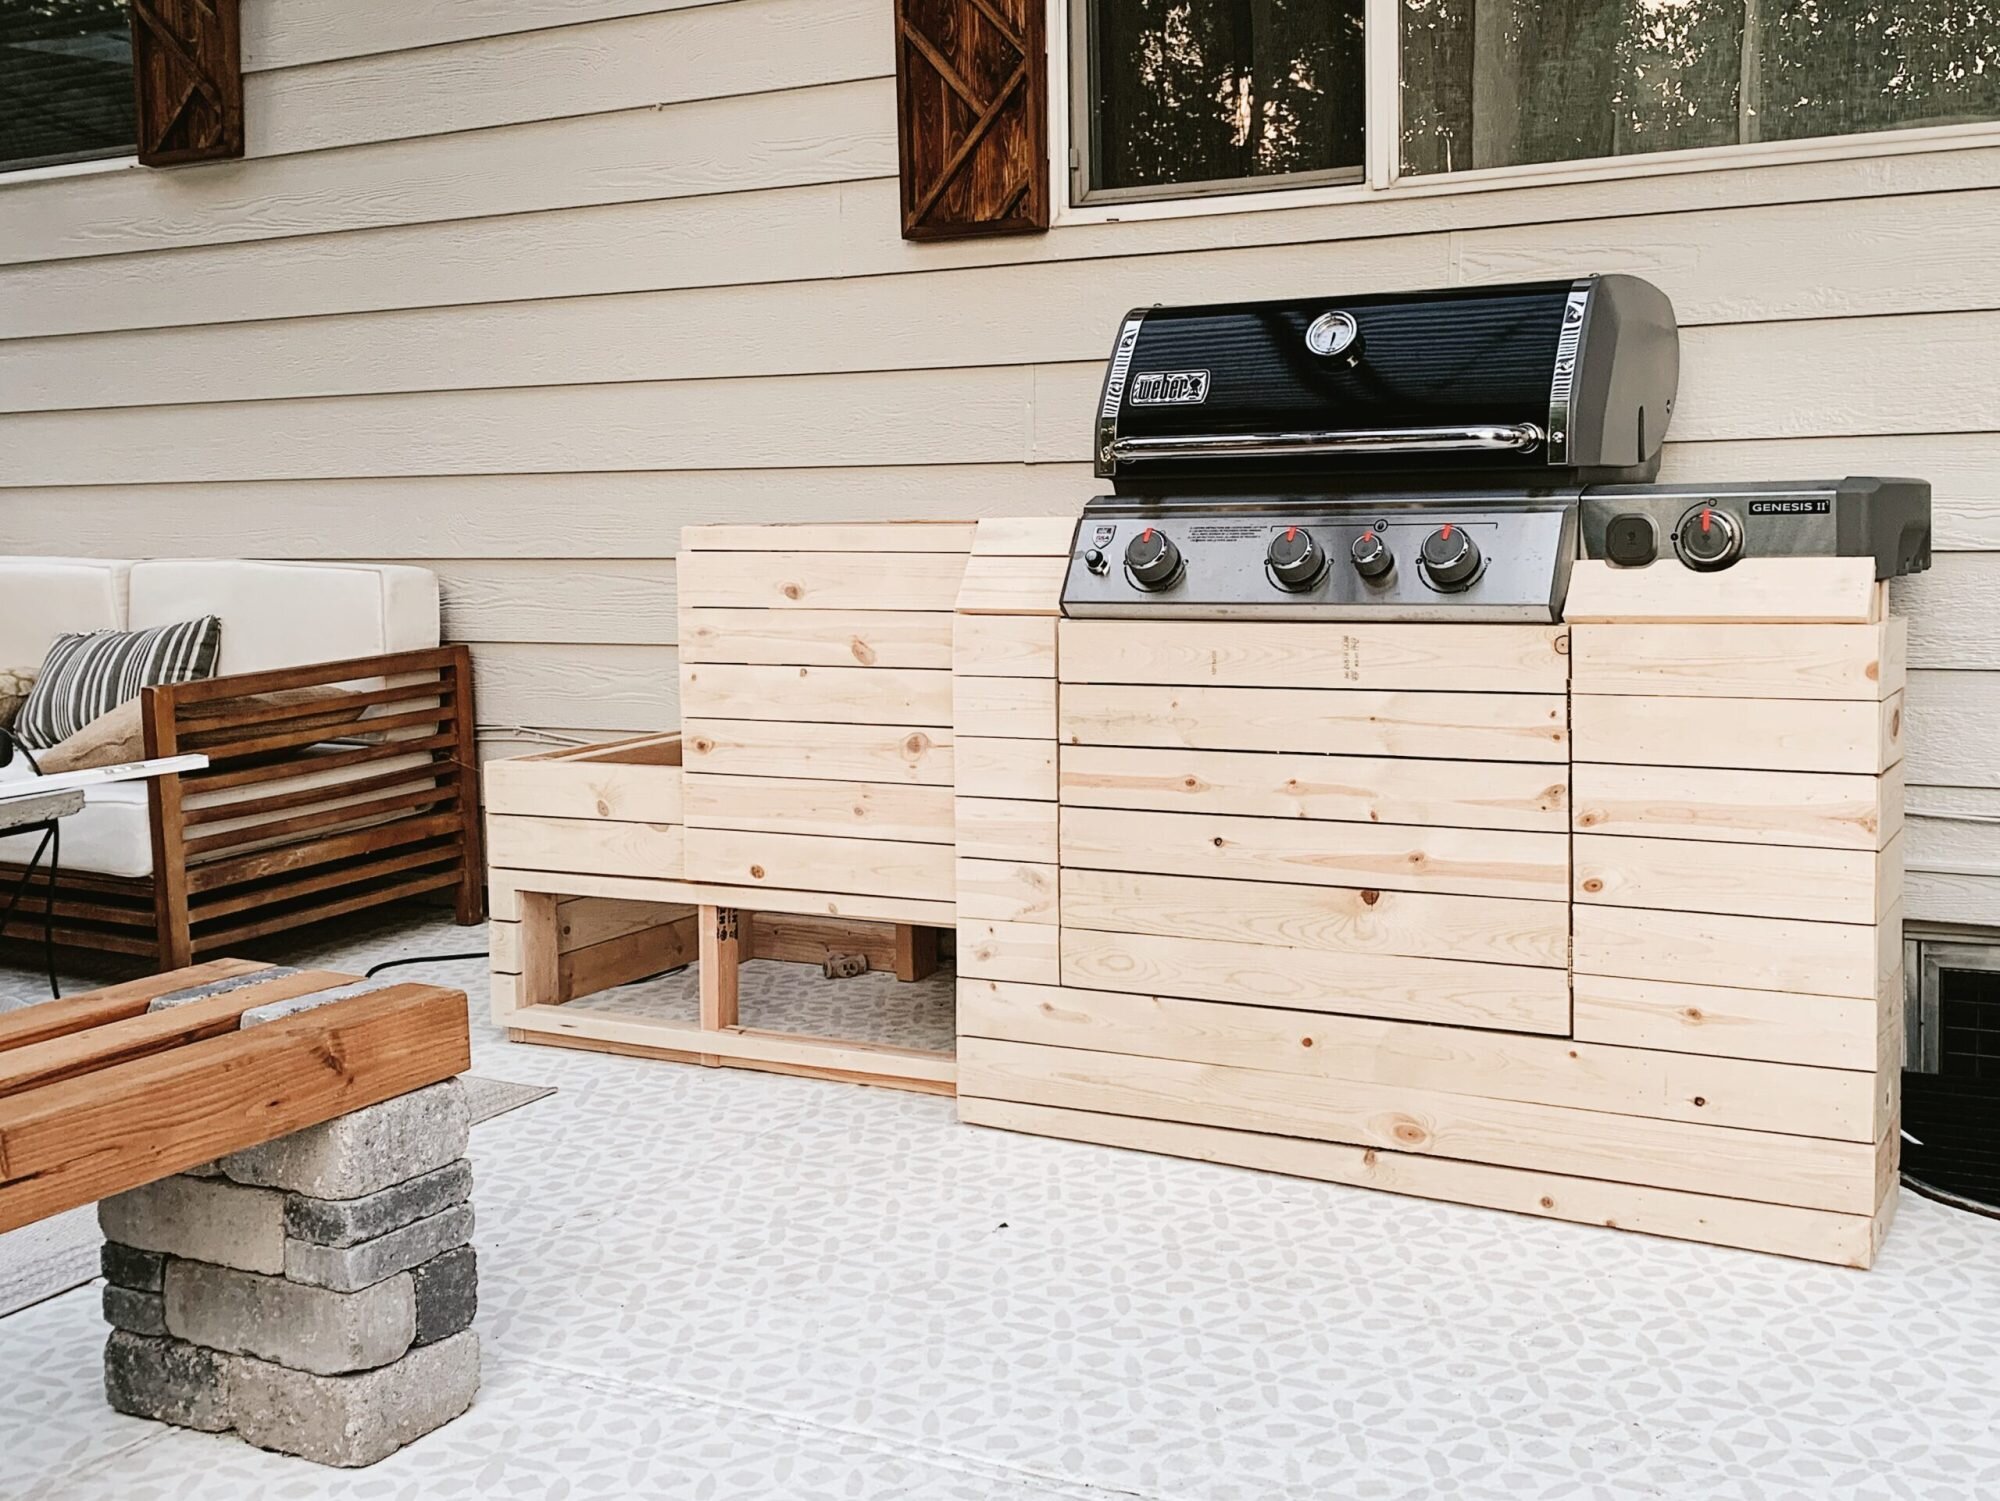
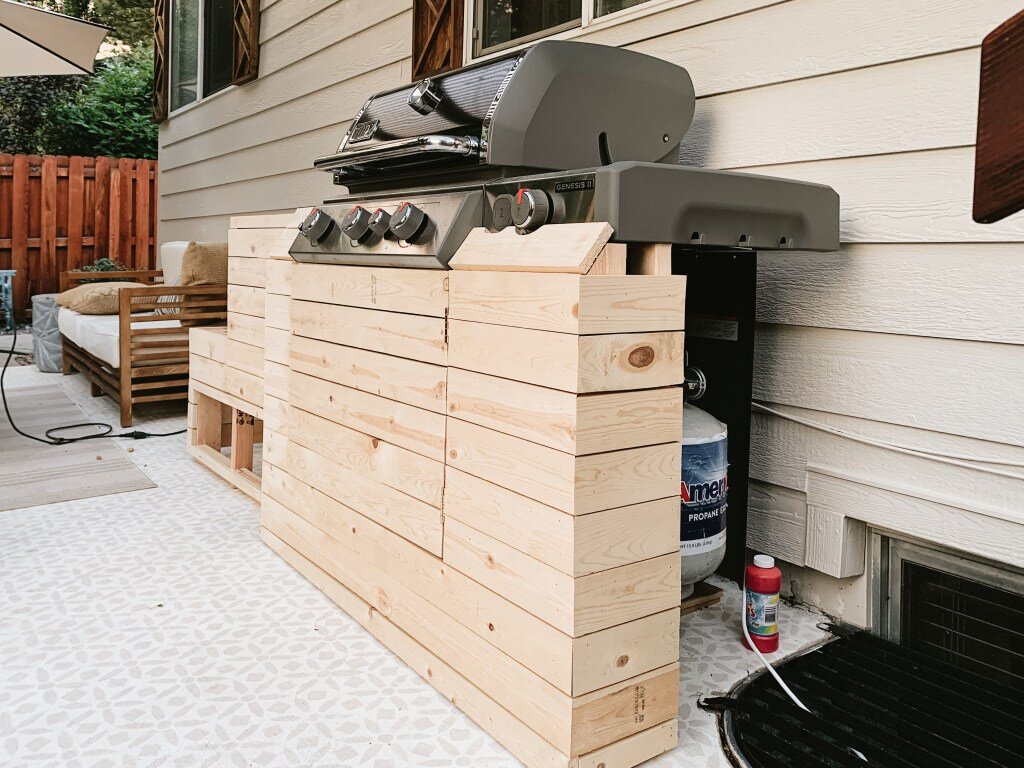
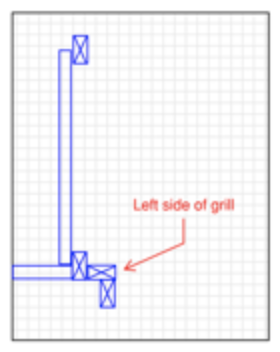
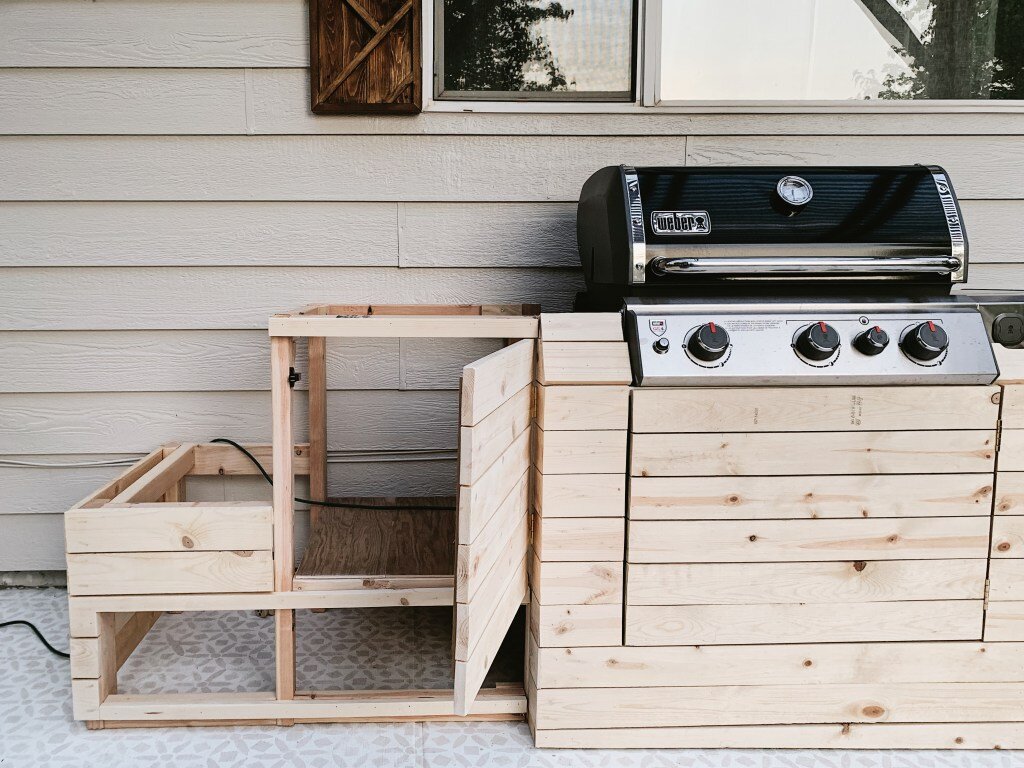
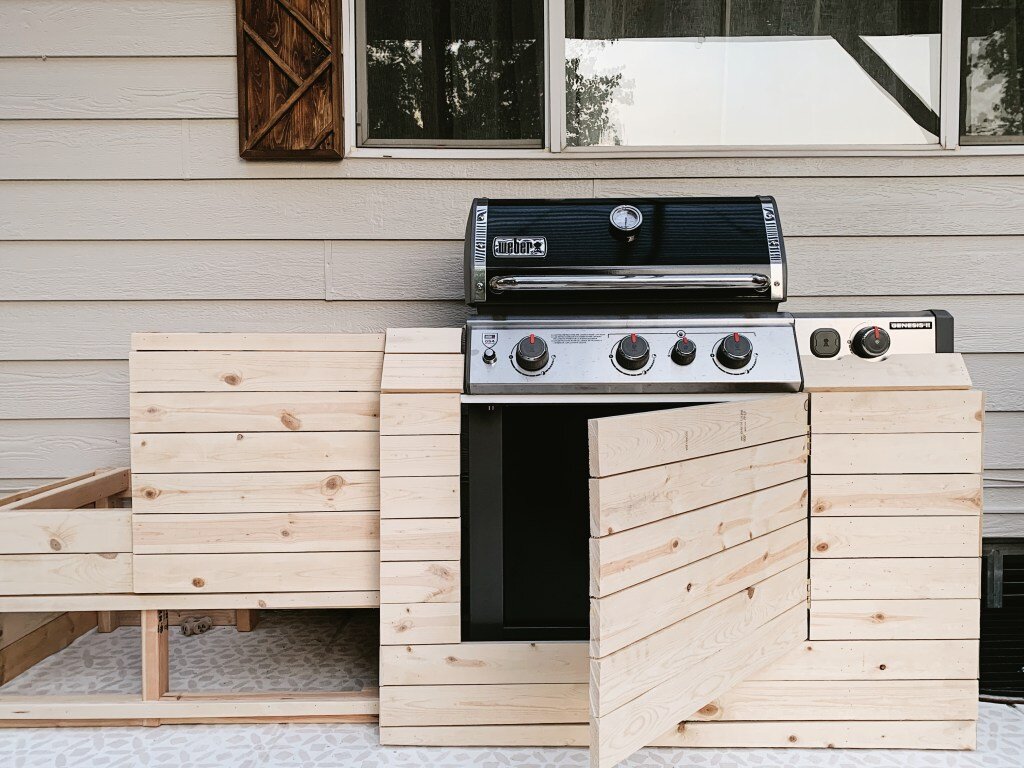
Determine if you want to remove one or both of the trays on either side of the grill. Our grill is a Weber Genesis II with an extra burner on the right tray. We also had the setup up against a window well, so we did not do more than a shroud on the right side of the grill. Step 2 will describe building the framing for the base and counter support on the left side of our grill. If you are able to remove both trays on your grill, you can easily duplicate this on the other side. Keep in mind you’ll need access to your propane tank!
PS – Our patio is on a gradual slope to prevent water pooling, so making our grill and framing level was HARD work. We will describe the following steps as if you are building this grill surround on a beautiful, level surface.
2. Frame your box: Materials – 2×4’s, 2×3’s, construction screws, and level
First measure the height that you want your countertop to be. Assuming your countertop will be 1 inch thick, you want to measure your four vertical studs to countertop height minus 1 inch. Cut four 2×4’s to that length.
Next you will cut the horizontal supports for the framing using 2×3’s. Measure from the back to the front face of the grill and cut four 2×3’s to that length.
Then taking the overall width that you want your counter to extend out from the grill, subtract 3 inches (1-1/2 inches for the stud on each end) and cut four more 2×3’s to that length.
3. Frame step down box: Materials – Same as first box
This is a step unique to our design. We decided to have a stepped down counter to work as an end table for our outdoor sofa. This is not necessary, but is a nice touch to give the wood grill surround some additional dimension.
Follow the same steps as above but to the height and width you desire. The only difference is that you only need to cut two vertical supports and one set of horizontal, front-to-back supports.
See, that was easy!

4. Build the Frame for the Right Side of Grill
Follow steps above
Great work!
5. Bump out for front face of grill
Now this is a tricky one to explain! With our grill, we chose to line up the left and right boxes with the legs of the grill, but that means the front panel, dials, and wheels protruded out past that plane. We had to “bump out” or fur out the front with a couple additional 2x4s on each side. Just make sure that when you attach these to the framing, they end up out past the aforementioned items on the front of the grill.
6. Wrap Framing Boxes with 1×4 paneling
For this step you simply cut your 1×4’s at the correct horizontal lengths from corner to corner of your framing.
We typically leave a quarter thickness (the currency!) between each board to give them a shiplap look.
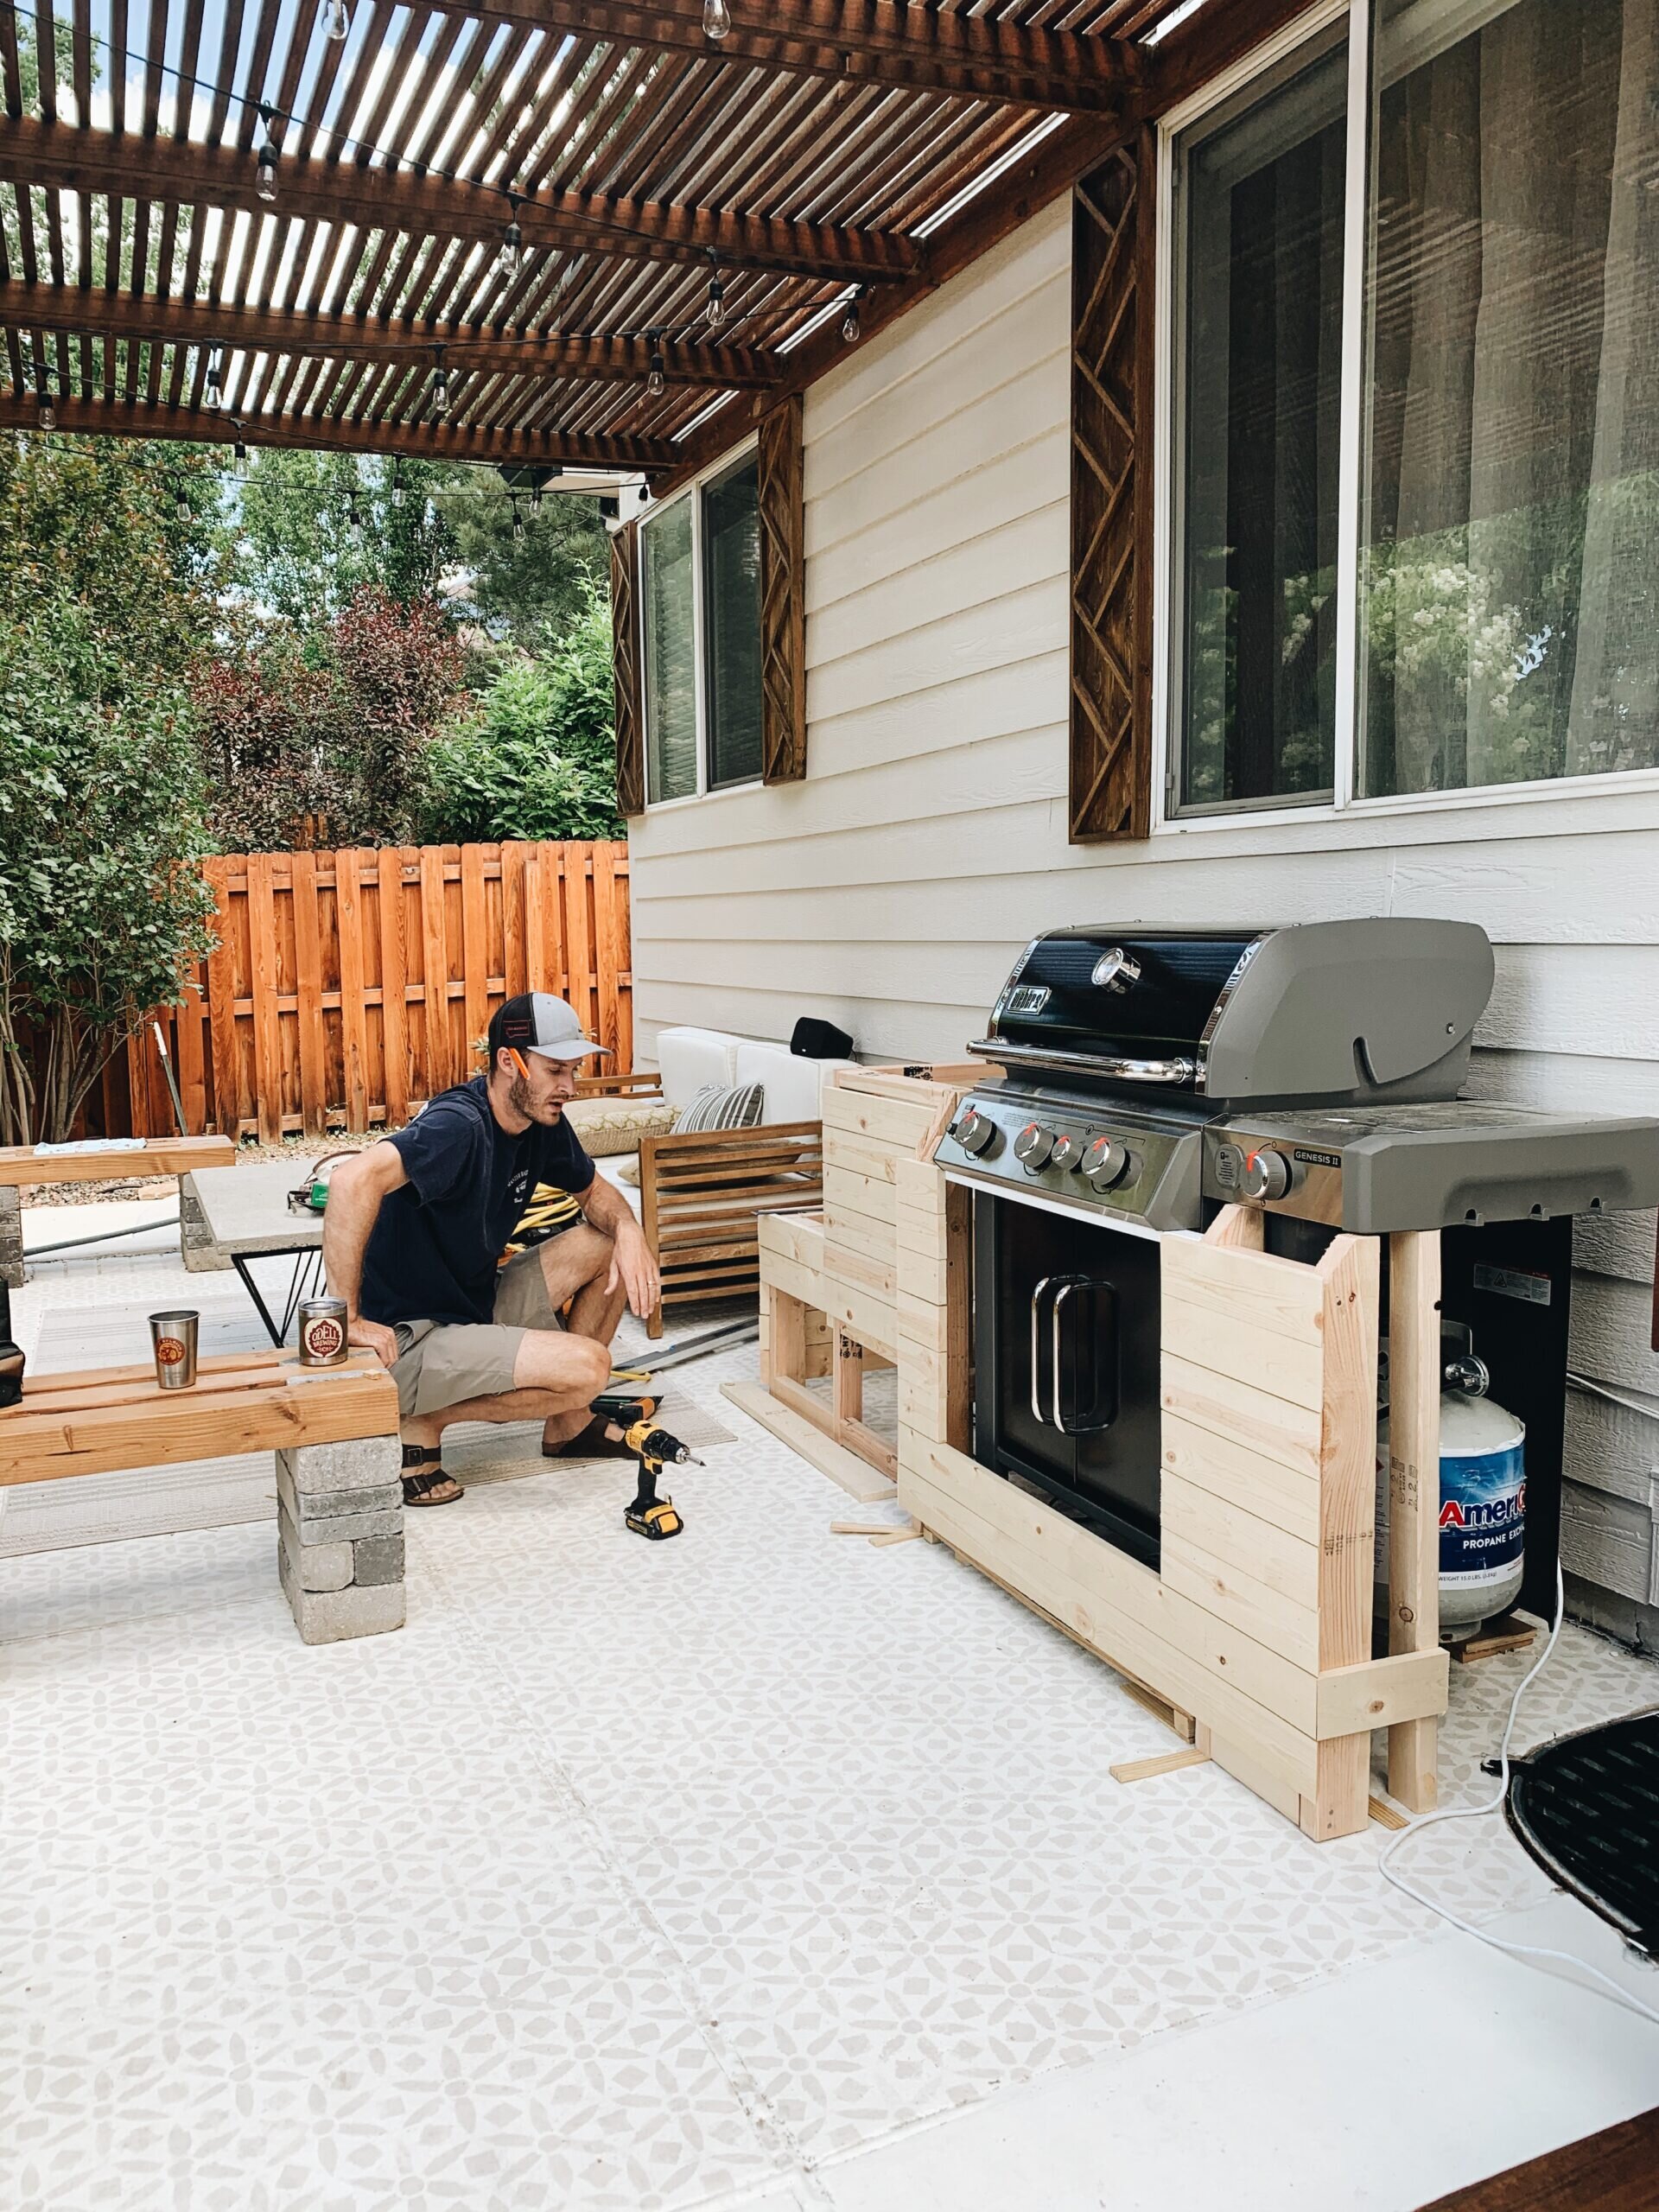
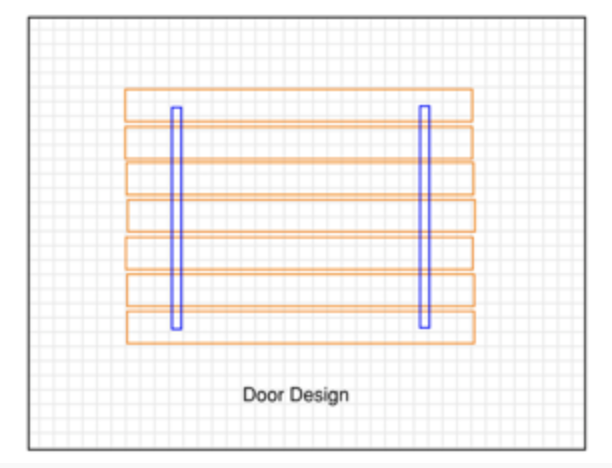
c. On our design, we left two open cubbies on the left side of the grill to throw logs under (we have a fire pit nearby). We also left two sections of the wood paneling on the front of the grill off so we could install swinging doors that give access to the grill doors and to our mini fridge we’ll be keeping out here. This looks plenty slick with just the opening, but if you want to install a door, simply using a couple of swinging hinges and magnet push latches will do.

7. Sand it down!
You can get away with hand sanding with 120 grit sand paper, but an orbital sander is highly suggested. Just don’t find time to do this around dinner time while your neighbors are outside enjoying dinner because it is quite noisy!
8. Stain and seal (or paint).
Part two will be linked here as soon as it’s ready!