

How We Built Our Herringbone Media Wall

I can’t even begin to recount the number of comments and direct messages I’ve received on Instagram asking me when I’d be sharing the tutorial for our two-day DIY herringbone media wall! The outpouring of love for this handmade addition to our home is so special, and I’m excited to finally have a blog post that tells you how YOU can make this happen in your home!
I’m not one to ramble (unless I’m leaving a voice message on your phone… very awkward; just do yourself a favor and delete the message if you ever see that it’s from me), so I’m going to cut right to the chase. Here are the materials you’ll need:
Materials
Disclaimer: I’m not being compensated by or earning commission from any of the brands I’m including here; I’m simply telling you what we used. If you have a different brand of miter saw or nail gun (or whatever!), that’ll work!
Tape measure or yard stick
Blue painter’s tape
Miter saw
Circular saw
1”x3” oak boards (8 ft lengths)
4×8 ft plywood (1/8” thickness) for backing behind herringbone wall
4×8 ft oak plywood (1/8” thickness, to be stained) for flanking herringbone wall
Oak 16” wide unfinished wood board (for top of the cabinets)—length will be the length of however many IKEA cabinets you buy so it can span the top
Decorative accent moulding (we chose 1″- to 3″-wide pieces in four different patterns, two of each pattern for symmetry on each side of the wall)
Sand paper (100 and 120 grit)
Minwax stain (we mixed Early American with Graywashed Oak until the color coordinated nicely with our French Oak floors
Staining rags
IKEA wall-mounted cabinets (we used x2 of the two-door cabinets, but I searched for two hours trying to find the link online, and I’ve come to the conclusion that they’re either discontinued or only available in stores)
Stud finder
A level
Trim finish nails and nail gun
1-1/2” finish nails
1-1/2” Construction screws (roughly 20-30 needed)
Wood glue
Prep!

The piece on the left used 2X the amount of Minwax Early American stain, giving it a warmer look than the piece on the right.
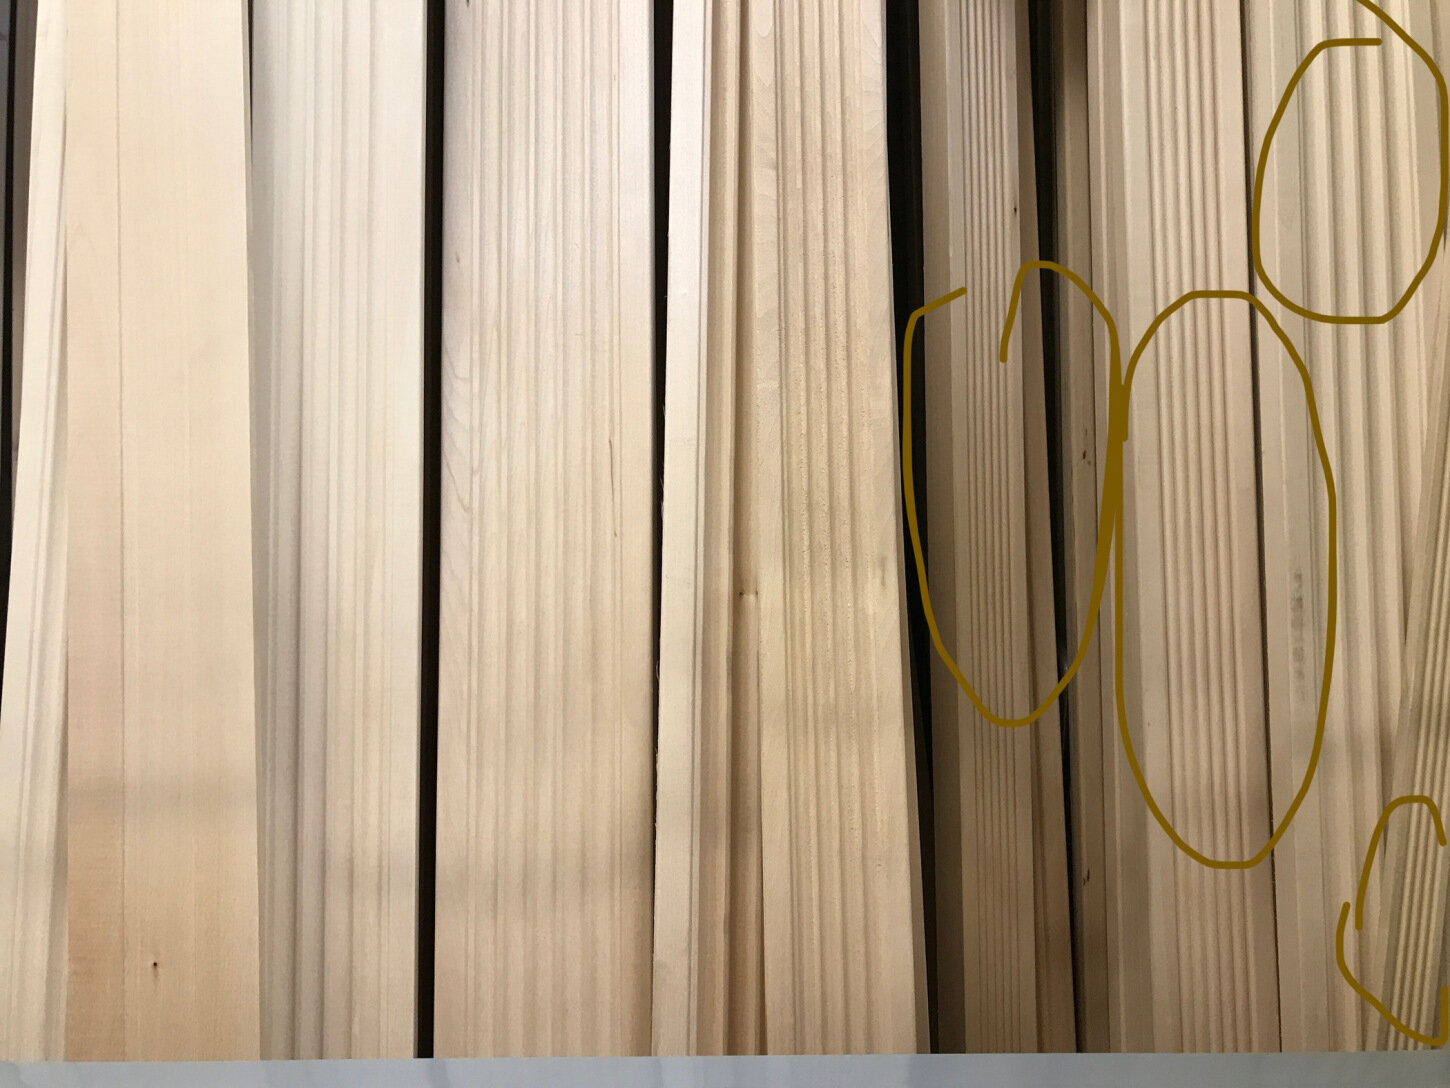
Before you make any cuts, be sure to test your Minwax stain (or combination of stains) on a sample piece of the wood you’re going to use for the herringbone. It’s important to test it on the wood you’re using for the actual project and not scrap wood you already had lying around your garage because each species of wood accepts stain differently. Testing your stain on pine when you’re installing an oak wall feature is not going to give you an accurate representation of the final coloring of your project.
If you’re mixing parts of one stain with another, it helps to measure and write down the “recipe” as you make it so that you can replicate it on a larger scale in order to stain all of the wood. We tested a handful of stains and combination recipes all along one board, allowed it to dry, and then cut it into smaller boards that we could hold up to the wall and see it in the actual space (make sure you do this in daylight, without artificial lighting such as lamps and ceiling lighting turned on). If you have wood flooring or a significant amount of wood furniture in the space, pay attention to how the wood tones play off one another. You want them to all be in the same color family, but not matchy-matchy. For example, if your flooring or furniture has a red undertone, you’ll want a warmer stain color for your wall. Our floors have a light, graywashed finish, so we chose a lighter brown stain and mixed it with a gray stain to give it a cooler finish.
Okay, so I say this was a two-day project, but this step technically makes it three. Once you find the right color for your space, lightly sand the edges of your wood boards (just to smooth them down a little, but you don’t want them to be rounded), then proceed with staining all of your wood boards. Note: You DO NOT need to stain your backer boards, as those will not be seen. You DO need to stain the plywood and decorative trim that will flank the herringbone part (we called these “the wings” when we made ours). Make sure you do this in a well ventilated area, and allow everything to dry overnight, and then you’re ready to start making cuts.
The Process
Now that you have all of your materials and you’ve done your prep work, you can start making things happen!
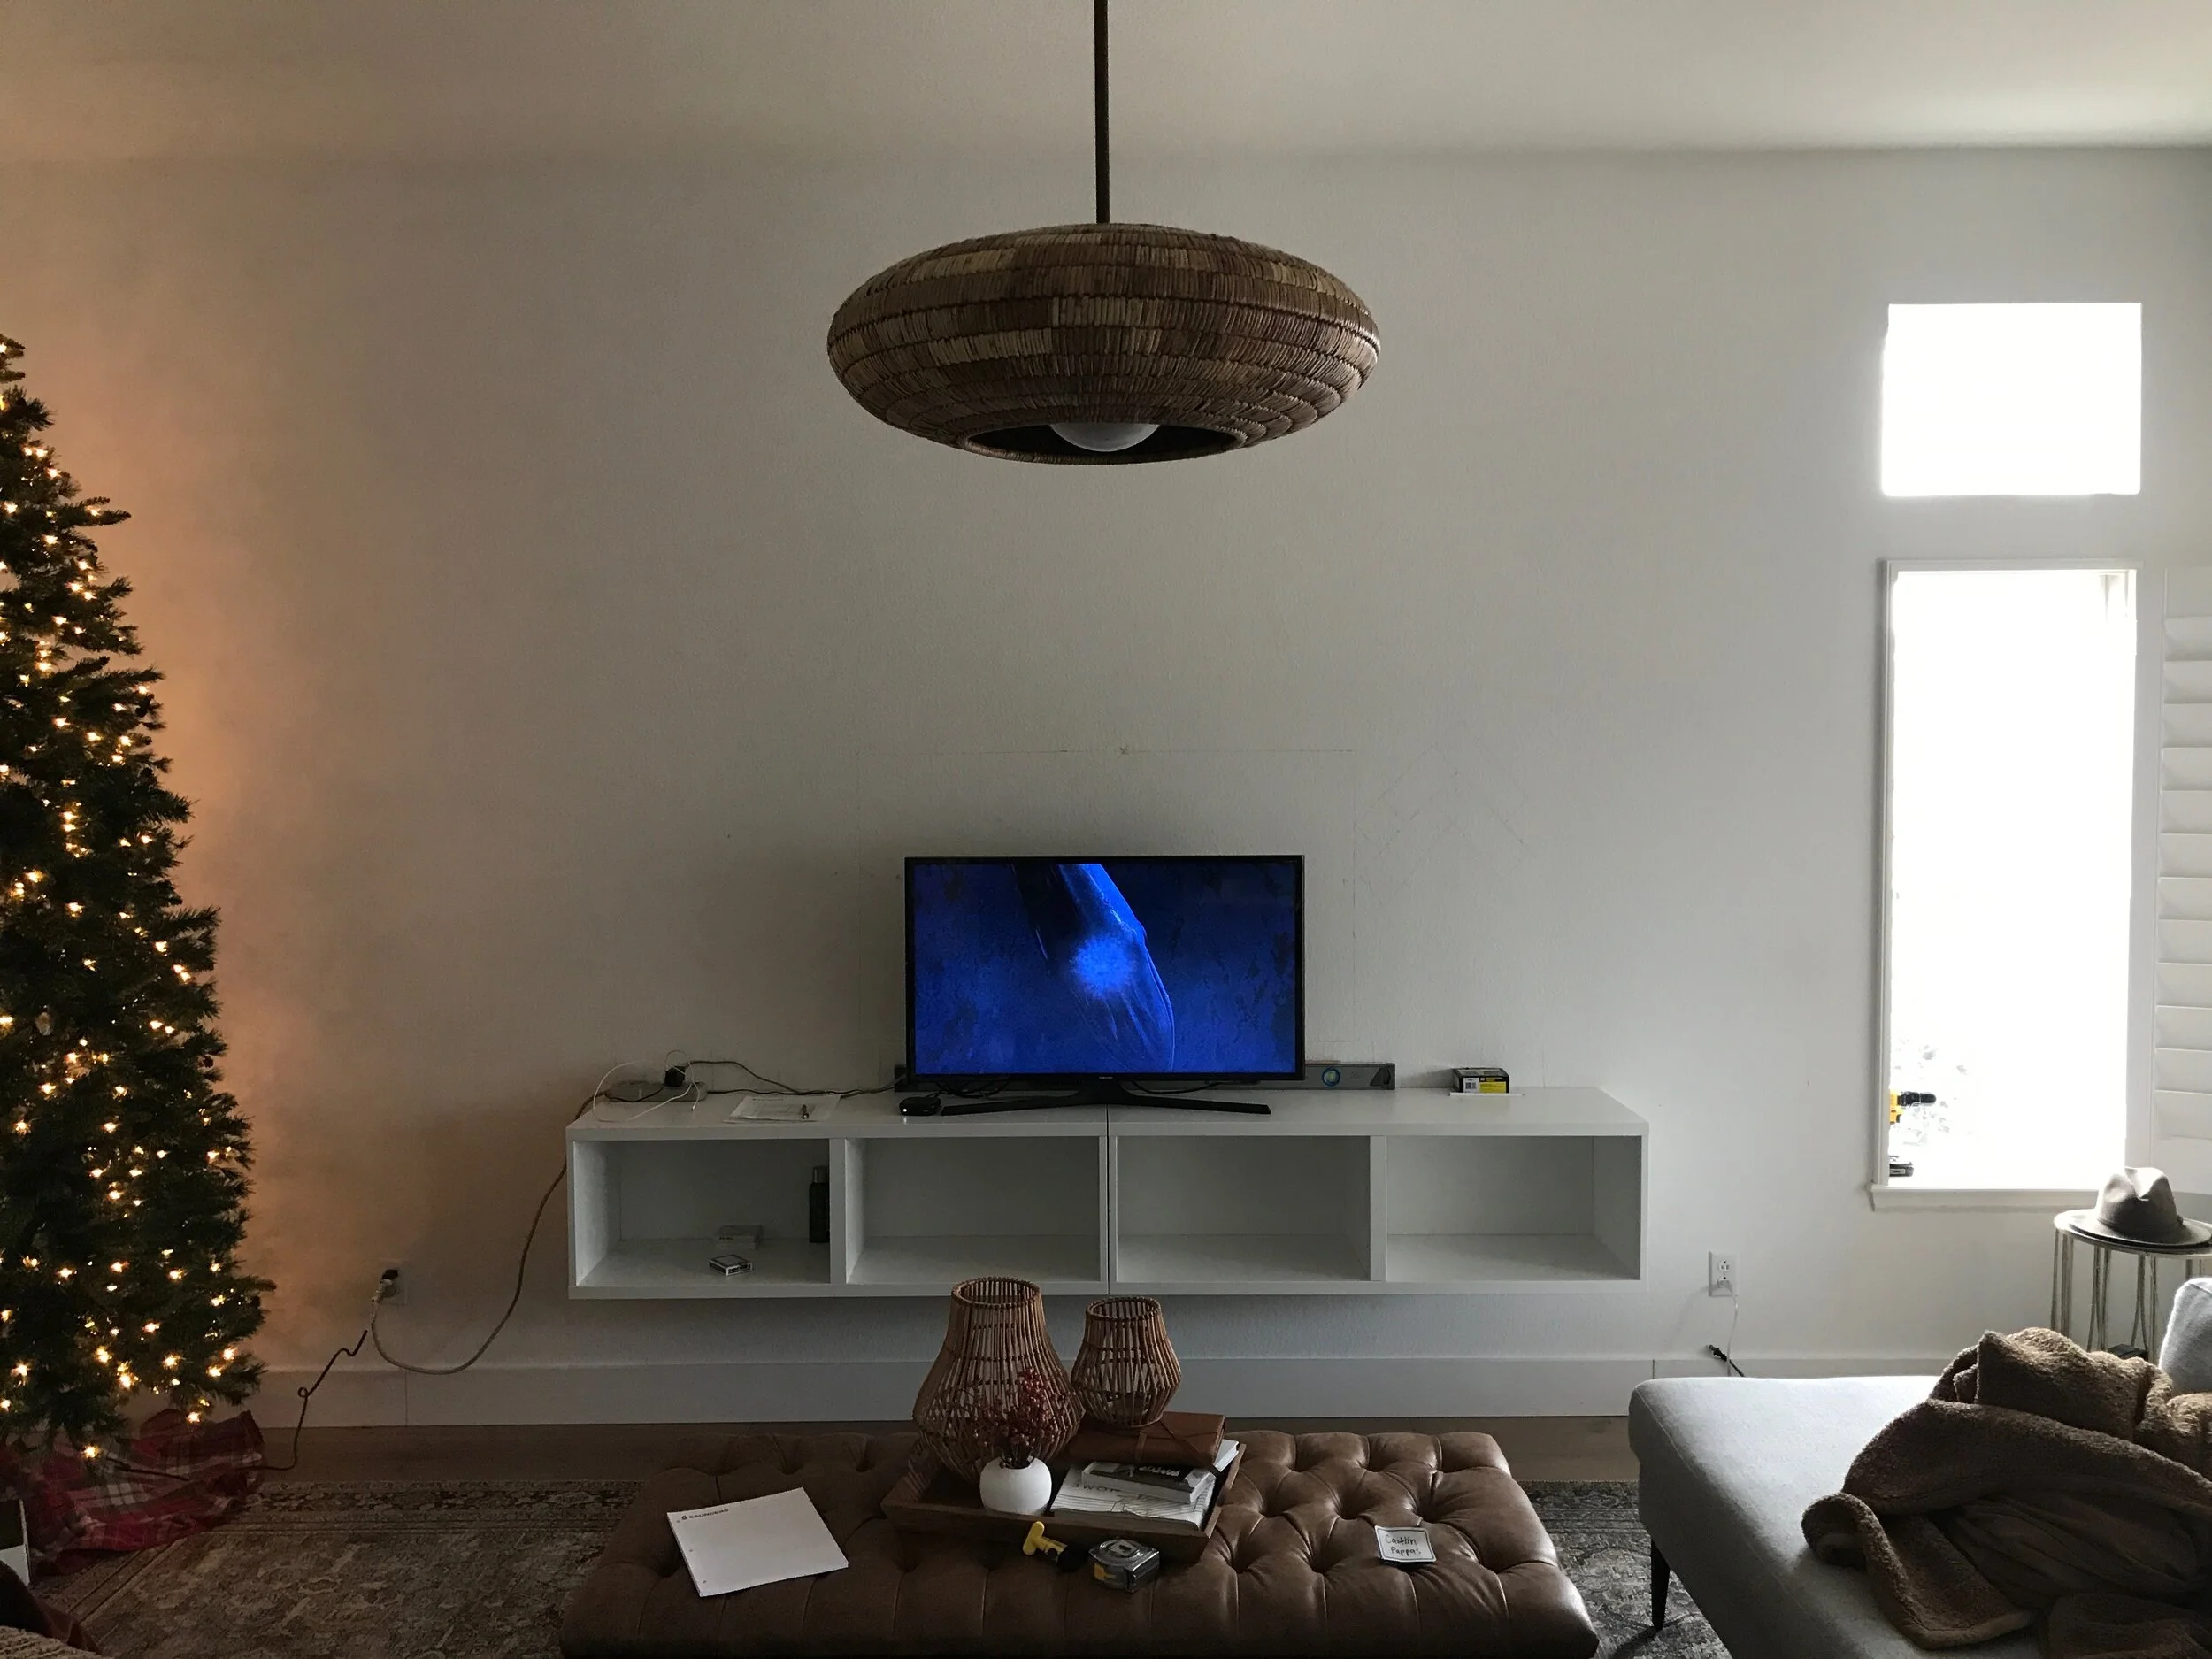
1. First things first: Use your trusty tape measure to figure out where you want this media wall to go. We wanted ours centered on the light fixture when looking into this space from the kitchen, so we made that the middle and then decided from that point how far to the right and left we wanted to take it. We marked everything with blue painter’s tape so that we could step back and try to envision how the finished project would look, making adjustments as needed until it was the scale we wanted.
We taped-out where we wanted our media wall to go. In the end, we changed a couple of things (we shortened the length of the IKEA floating media console so that the wood extended past it on both ends, giving it a more built-in look).

2. Using a stud-finder and a pencil, mark all of the studs that will support this wall feature. Be sure to mark the outer edges of each stud, using arrows to show on which side of your line the stud is located.
3. We mounted our IKEA cabinets before we hung any of the wood. The IKEA cabinets and hardware have detailed instructions for installation. Make sure you install the top of the cabinets at 30-33″ high (ours are 32″ h, plus 1″ when you add the wood board on top). We have 10′ ceilings, so we went a little higher than standard media console height. Anyway, these will serve as a floating media console.

4. Using your construction screws, secure the backer boards to the studs, filling the space above and below your floating media console, and only at the width you will install your herringbone pattern. These will serve as the backing to the smaller wood pieces you’ll nail up in a herringbone pattern, as not all of those will reach a stud. Once you’ve filled the entire area with plywood (backer board), you can begin the herringbone wood installation process! Load up that nail gun…
5. Using your table/circular saw, cut your stained oak (1″x3″) boards in 10″ long pieces. We chose 10” lengths because a 1″x3” board is actually 2-1/2” wide. We decided to use a width-to-length ratio of 1:4 for symmetry purposes on the wall. This is a small detail that you’d never notice, but does please the eye! This is a great time to have a partner. You can stack as many boards on your saw as you’re comfortable with (and that your saw can handle cutting through), and have your helper feed the long boards 10 inches at a time while you cut. It helps to make a mark on your saw or install a guide so you hit 10 inches on the dot each time without having to measure each cut. You’re going to have stacks upon stacks of these, and since they’ll likely still be emitting vapors from the stain, I’d recommend you keep them outside or install them on a day (and night) when you can have all of your home’s windows open. We did this during the winter and failed to let the wood air out long enough, so we froze our butts off while our home aired out.

Santa came early with stacks and stacks of stained oak! JK, we bought, cut, and stained these ourselves. Oh, and by “ourselves,” I really mean Jason did all of this.
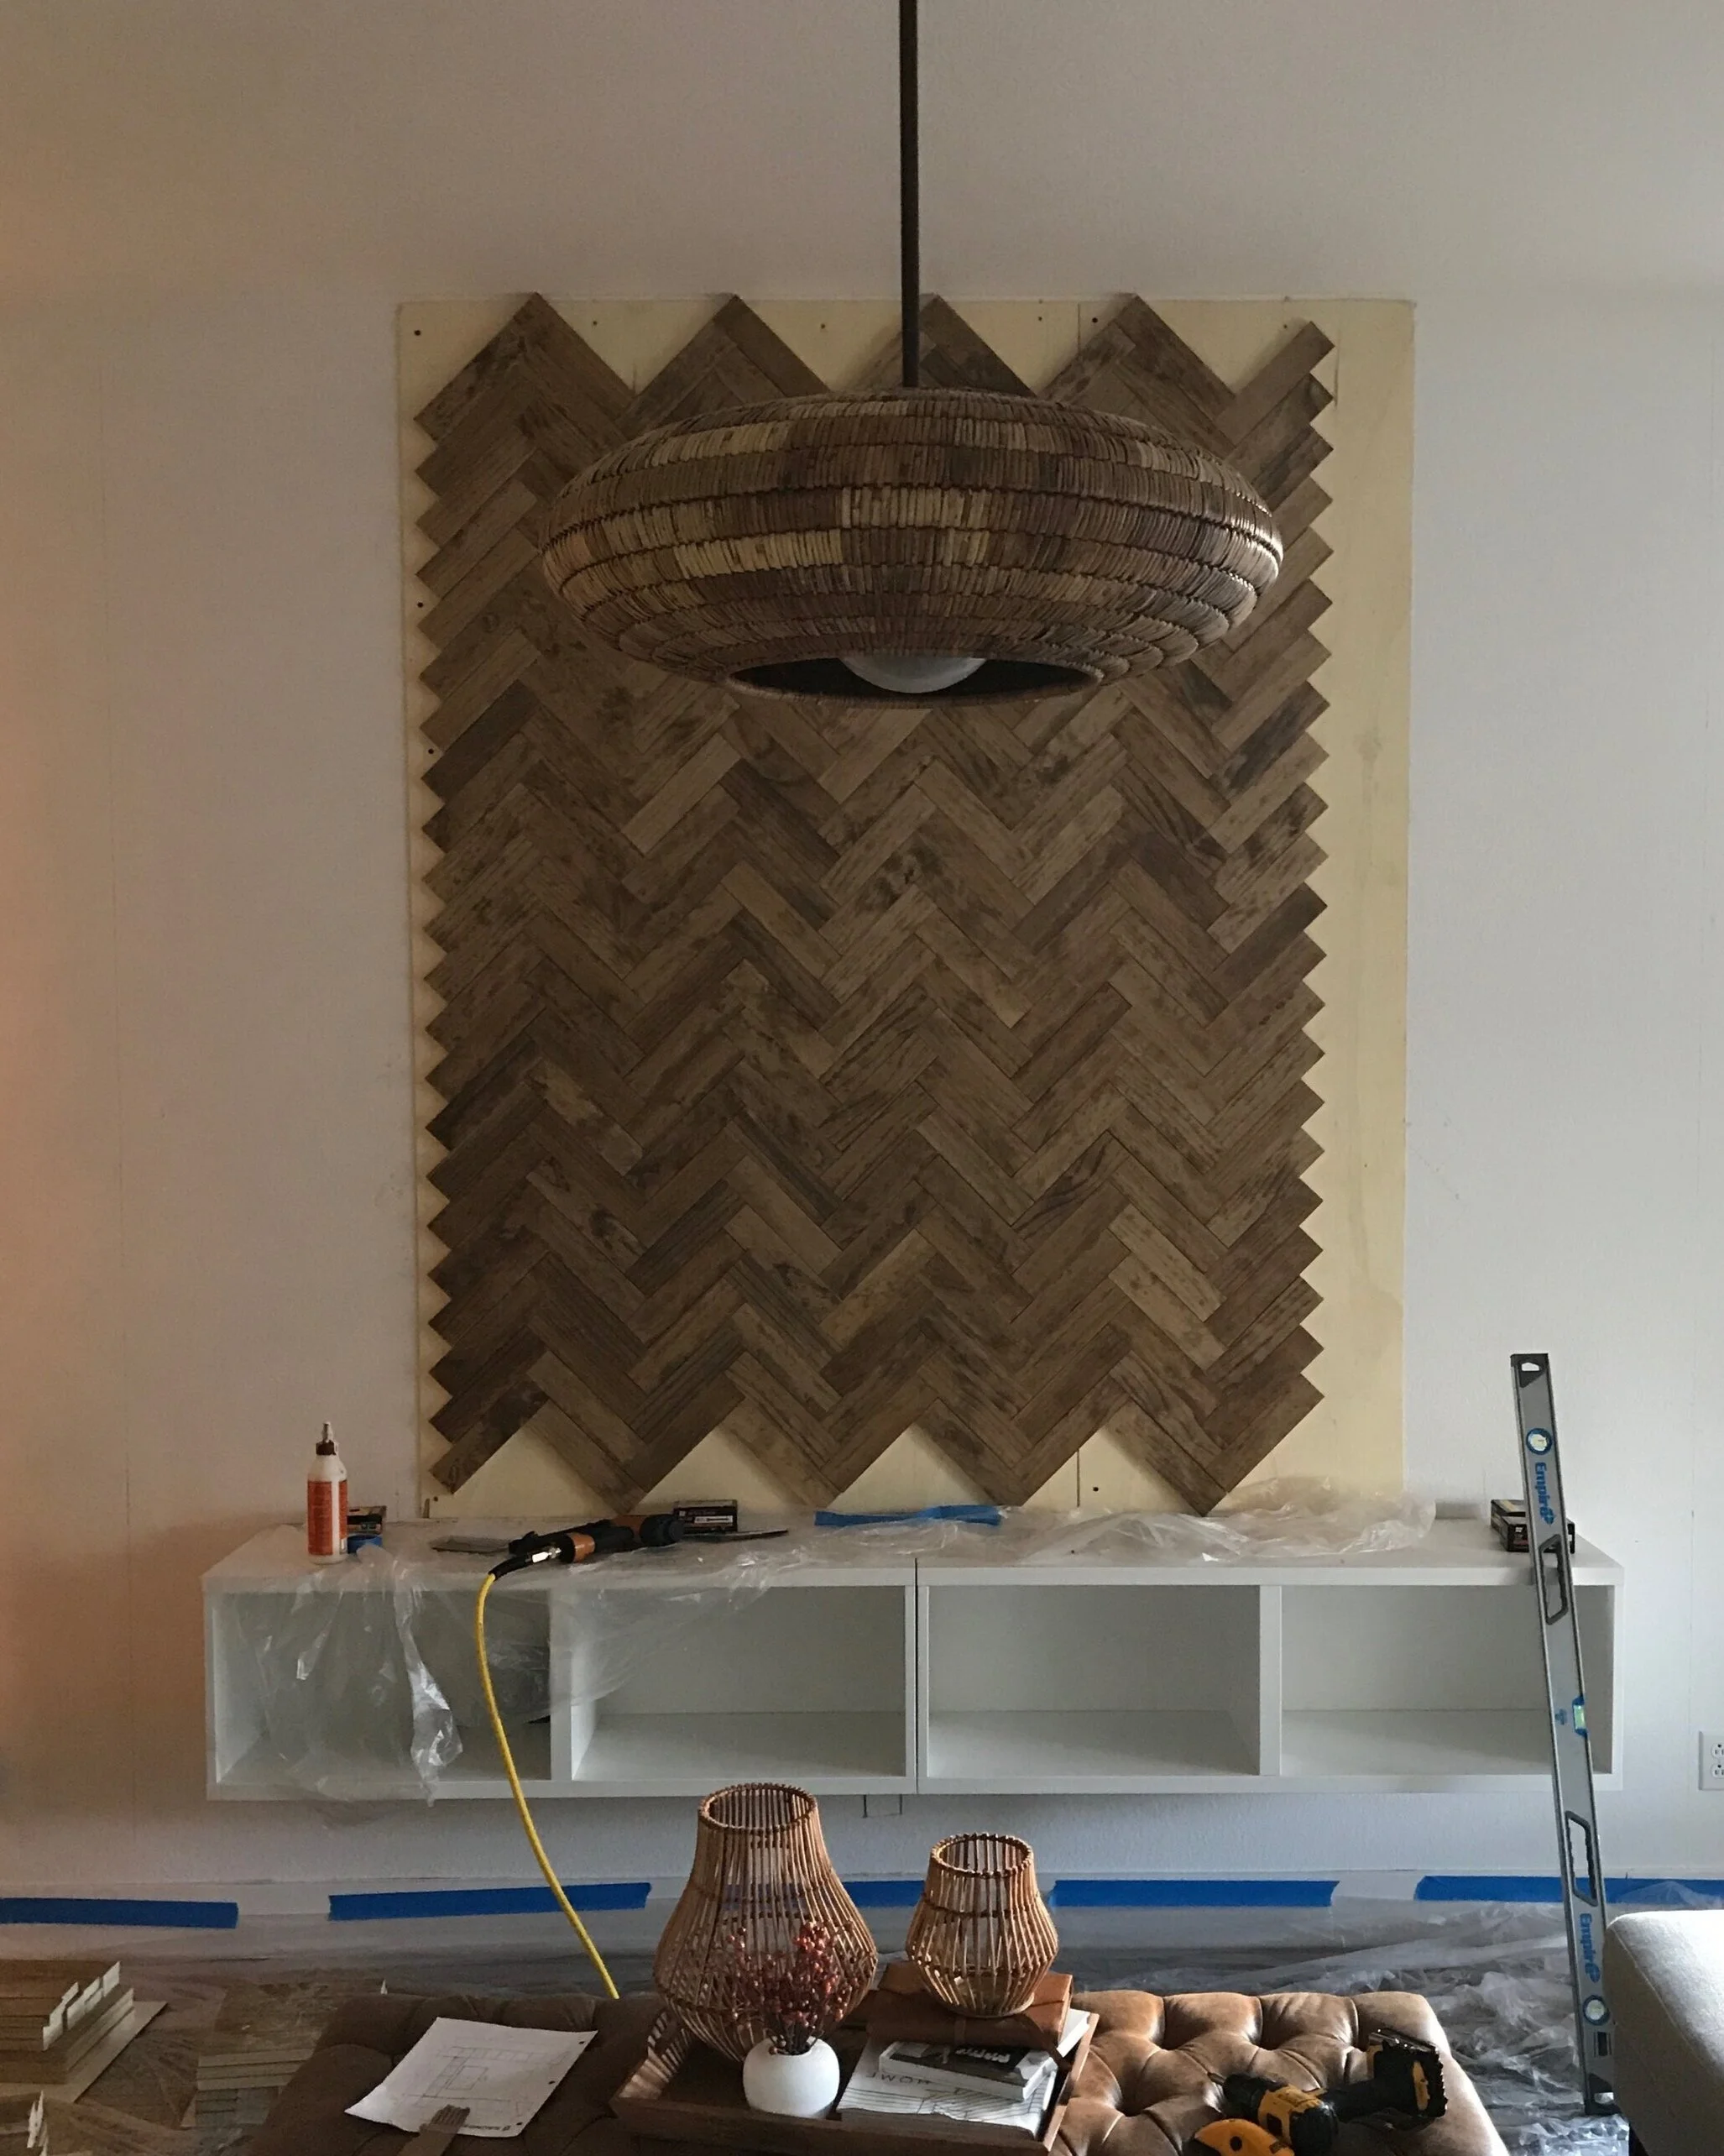
6. Measure to find the center of your media wall, and lightly draw a vertical line. This will tell you where to begin installing the herringbone pieces. Starting at this line, place the top corner of the first herringbone wood piece at a 45º angle. Jason and our good friend Kurt used an angle and level to be certain we had 45º. You will make sure the top corner of each wood piece above and below that first piece follow that line all the way to the floor and ceiling. For added security, you can add wood glue to the back of each piece (we did), but I’m not 100% convinced it’s necessary. The nails should be able to keep everything secure.

With herringbone installations, accuracy and consistency are crucial! Otherwise, you’ll have a butterfly effect of misguided herringbone pieces climbing up your wall.

7. Insert one nail at each end of this piece, then change directions and add your second herringbone wood piece, with one nail at each end. Work your way up and over. You’ll see triangular gaps along the ceiling line and the bottom, but don’t worry about those until the very end. Repeat this step until you’ve filled the majority of your backer board with your herringbone wood pieces. As you reach the sides of your backer boards, mark a vertical line one inch in from the edge of the plywood backer board. You will want to cut your edge pieces to line up with this line and use a 3″ trim piece to “bookend” the herringbone, cover your backer board, and provide a transition from the herringbone to the stained, flanking plywood.
8. Go make your cuts, come back, and nail these shortened pieces to the backer board. It’s okay if the edges are not meticulously aligned, as you’ll place a trim piece here to conceal the edges. That being said, the trim can only do so much, so be as precise as you can. (PS – this is the most meticulous part of cutting the herringbone wall. It may take twice as long to finish the edges as it took you to install the middle!)
9. Once you’ve filled the entire space above and below your floating media console with herringbone wood pieces, measure the sizes of the remaining triangles. They’ll all be relatively similar, but to save yourself from having to go out and buy more wood in case you cut some pieces too small or at the wrong angle, stick to the time-old saying: “Measure twice; cut once.”

Wahoo! The middle section is complete (well, we still need to do the bottom…)
10. After you’ve filled in all of the gaps and your herringbone portion of the wall is complete, secure the long plywood board (stained to match the herringbone wall) to the top of your IKEA wall-mounted media console. This will hide the lines between units and look like one solid top (because it is one solid top), giving it a more custom, finished look.
11. Once your herringbone wall is finished from side to side, it is time to install the stained, flanking pieces of plywood (we chose a width of these flanking pieces to be a ¼ the width of the herringbone wall). You will install your stained plywood on either side of the wall and up against the backer board using your 1-1/2” finish nails. It helps to leave a ½” gap between the stained plywood and the herringbone backer board, and make sure your stained boards are level! Your 3” trim piece will cover this gap anyways.
12. Next, use your nail gun to add some decorative trim pieces along the two vertical edges. Note: Due to the thickness of the herringbone wood pieces, these trim pieces are to butt-up to the edge of the herringbone section, not overlap. Side note: This is how we shopped for trim since I was at home with a napping baby while Jason went to the hardware store for supplies.

13. You’ll then add the stained plywood as “the wings” (if you didn’t read my prep notes, go there now to see what I’m referring to), making sure to measure and cut carefully around your floating media console. This will butt-up to the other side of the decorative trim piece, so make sure your cuts are straight!
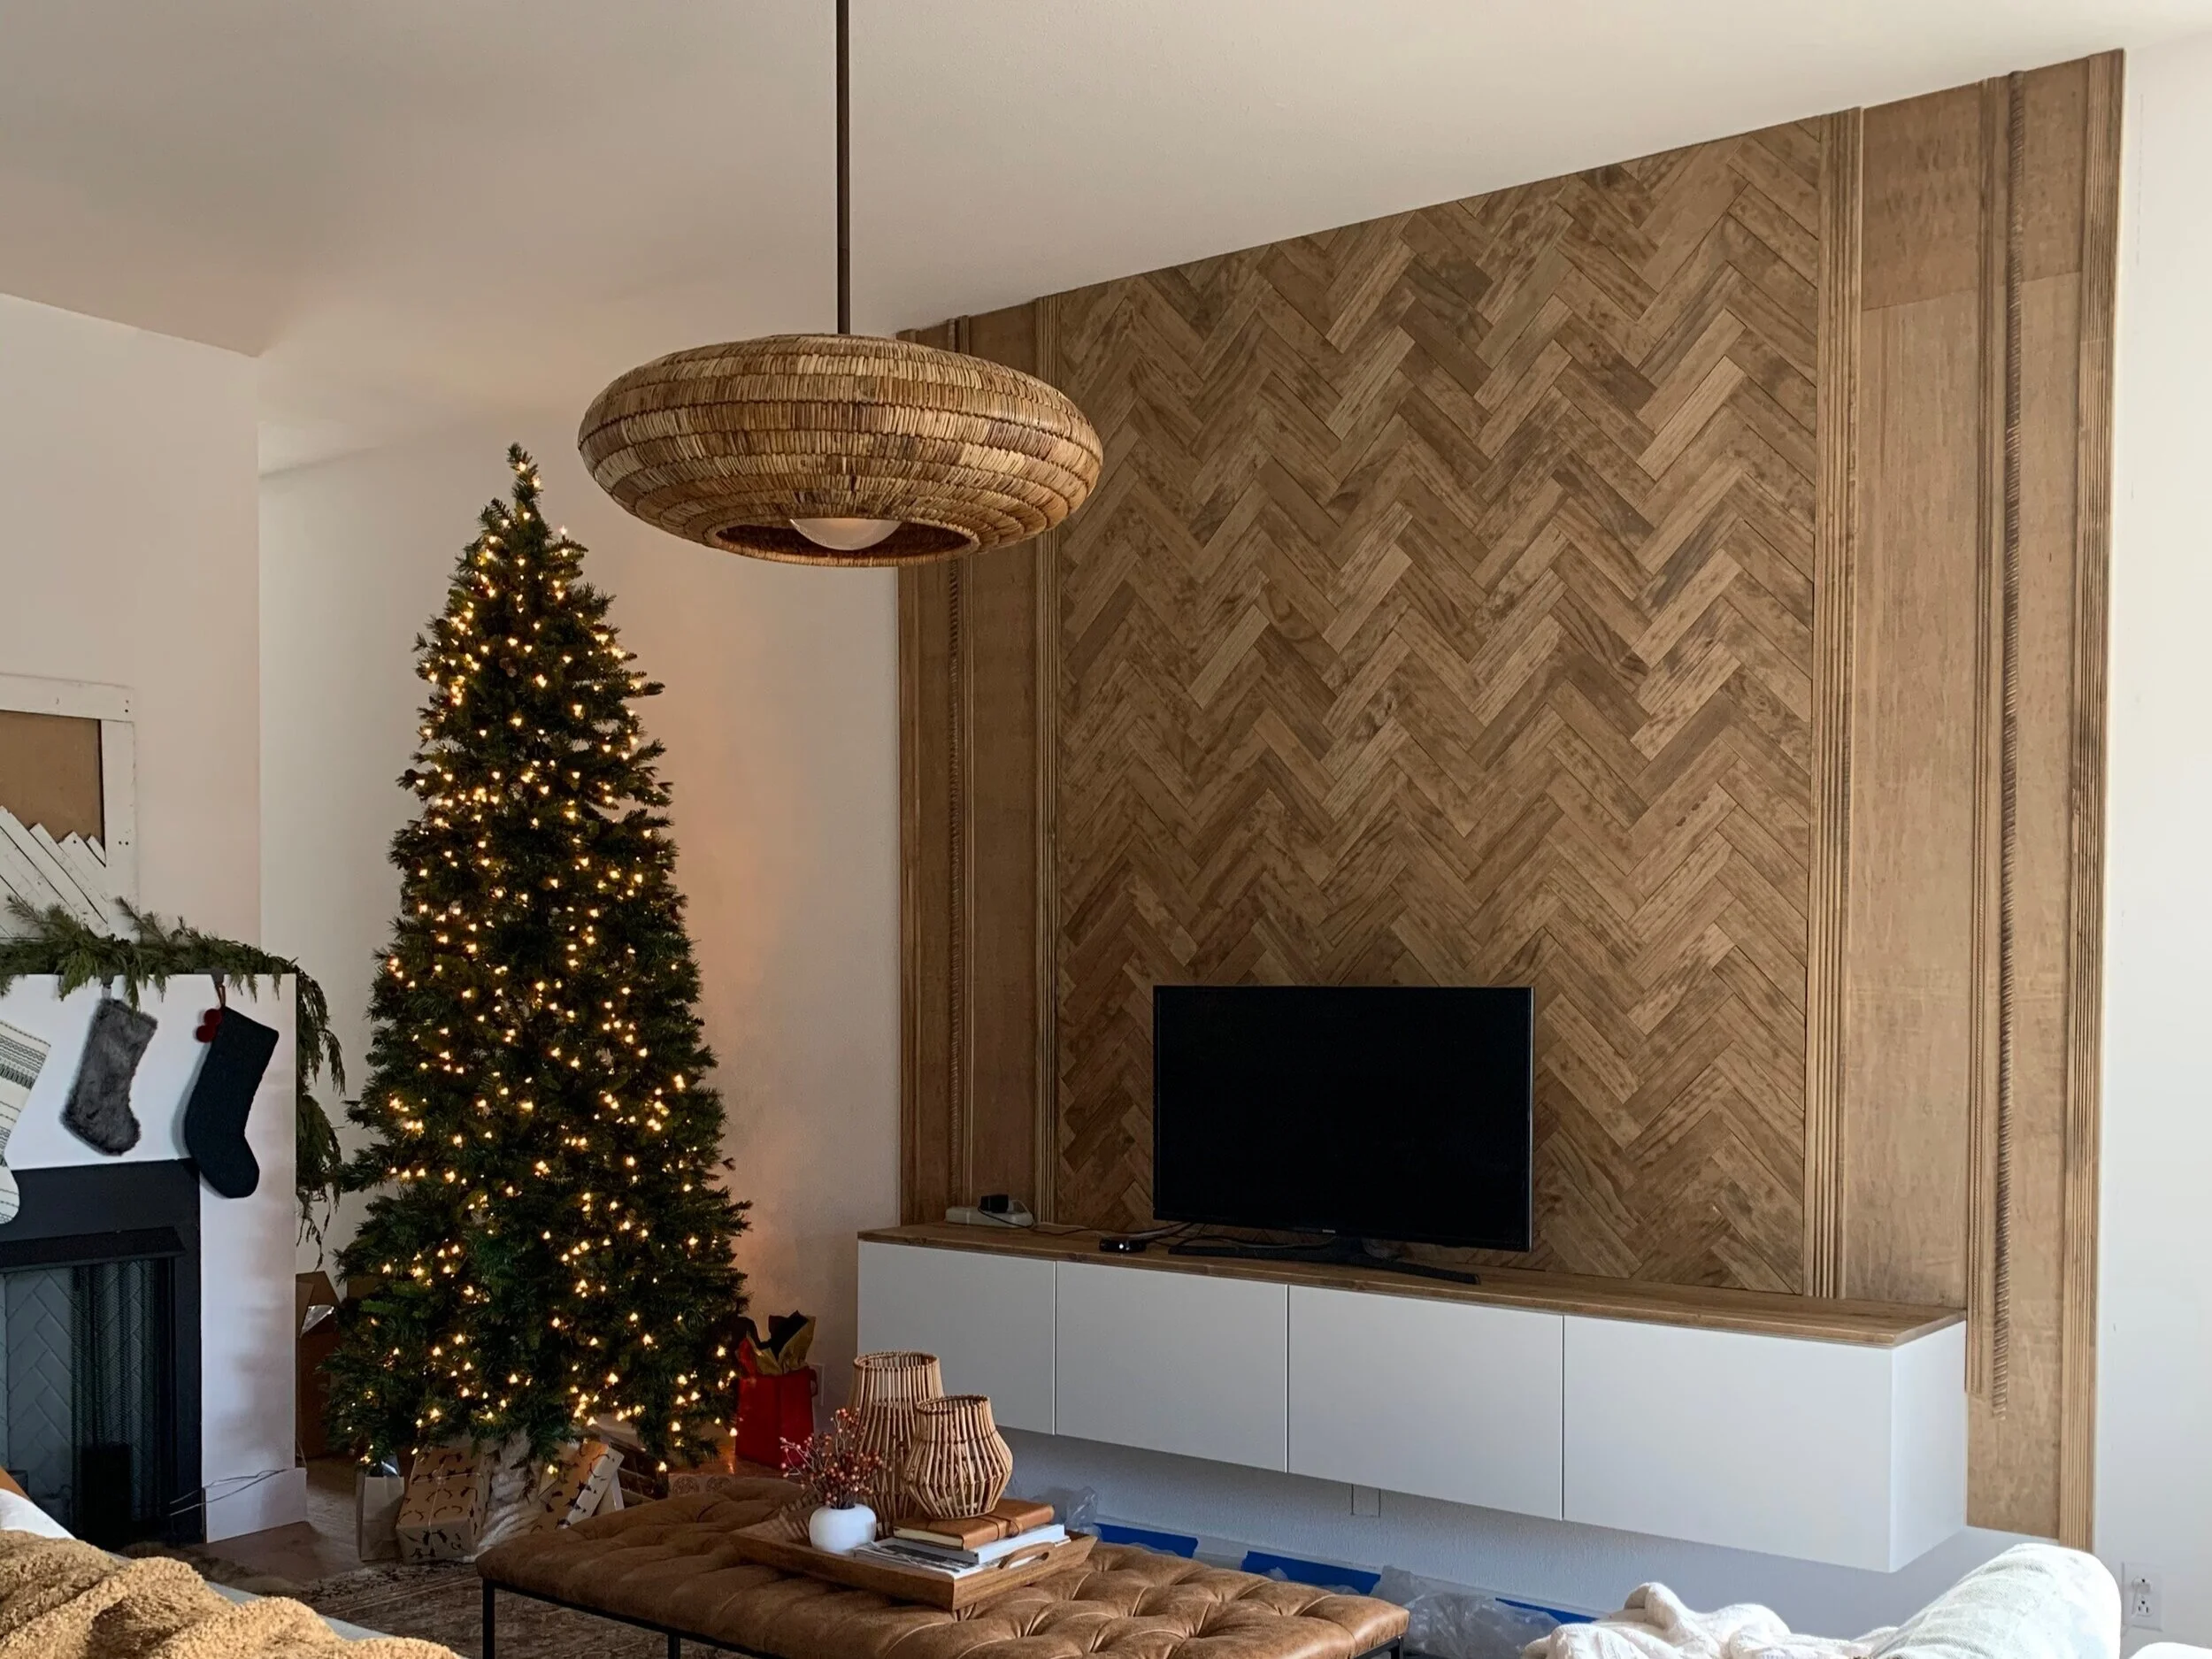
Look closely at the trim. See how it’s installed next to the herringbone and not over it? Same with the pieces on the ends—those are installed next to the plywood. The only trim pieces that were installed over the stained plywood were the middle pieces.
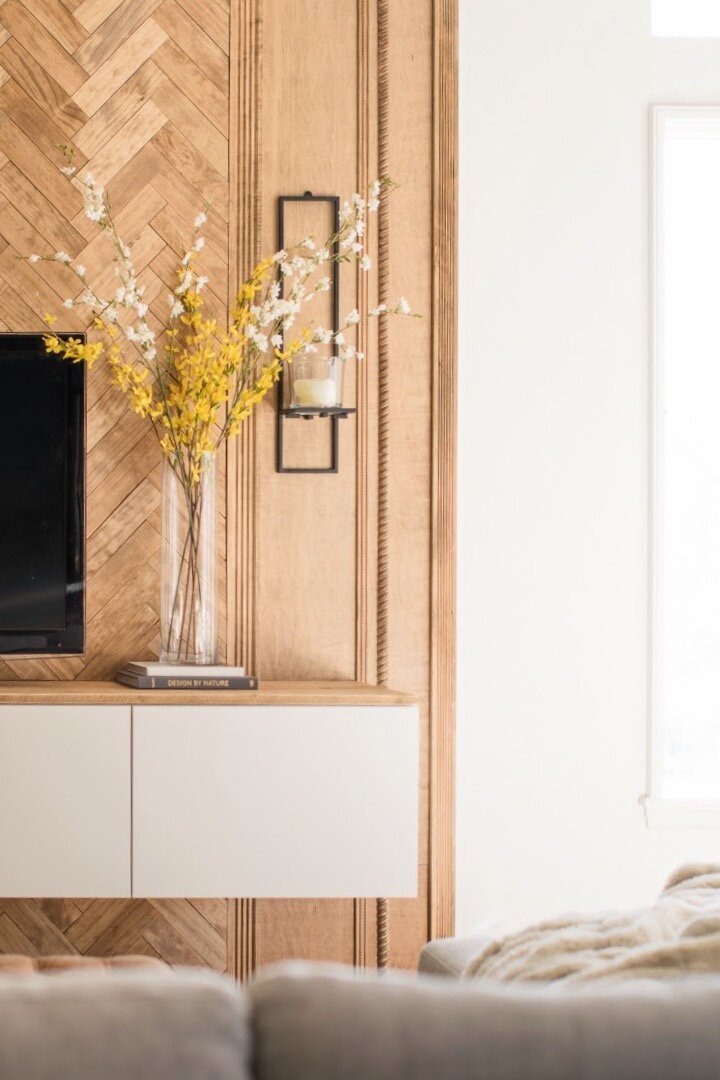
14. We had plans of mounting some modern candle sconces (ours are out of stock, but these are similar!), so we spaced-out the trim pieces asymmetrically. It also worked out really well that the middle trim pieces aligned with where the “wings” met the IKEA floating console and concealed our cuts. I will say that even before we hung the sconces, I loved the asymmetry of these vertical trim pieces; it was unexpected and added some whimsical visual interest.
15. Step back and take in the magnificence that is YOUR very own wood herringbone media wall! Bravo!

